Friday, September 23, 2011

Fringed Edge, Loom Woven On Separate Layers

Still in process of finishing some ideas for the Christmas Tree Cuff, shown further down.

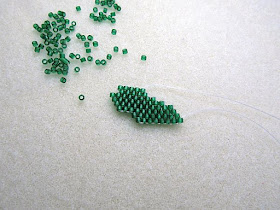
Because the tree extensions, in the pattern, hang over the edge of the weaving, I am not able to create a fringe to fall 'below' the tree, as well as on either side. Therefore, I decided to weave a thin strip, three beads wide, fringe it, then attach this to the back of the Christmas Tree Cuff. This way, the fringes will hang completely across the length of the finished cuff.


Looking at it, now that it is cut from the loom, I see possibilities of weaving something like this as a cuff, alone! I would, however, add an edging to the upper edge. Just a simple edging, but something to close the bead openings, as I do with all of my creations.

This feels wonderful wrapped around my wrist. I'll have to revisit this idea again, later!

Sunday, September 18, 2011

Weaving with Large and Small Beads

Recently, some one emailed me a note asking if I am familiar with this style of bead weaving, 'large and small' beads on the same warp set up.


I have made many like this. The email made me decide to share this technique, as it can lead to many other design ideas!

The loom is warped to handle the wide width of the beads in the center, weaving across the top first to hold the cuff width, then only weave down one side.

Notice how the loom is warped. Many warps are wider apart then how they would be warpped if you were weaving small seed beads, one in between two warps. These warp widths are warped to handle 'more than one seed bead across' or 'in between two warps', even 'one large bead in between the same warps'.

Keeping the warp width bead count in mind, weave the first row, completely across the entire width of the cuff, to hold the spaces open for more weaving downwards.


The picture above depicts me weaving two seed bead in between two warps and one seed bead in the row, along the outside edge. The width of the warps in the center, not yet woven, were sized far enough apart to hand three seed beads across or one large bead in between two warps.

When I got to the desired length, I also wove across the base.


Then I started the other side, the same way, weaving just up the edges. Notice that I also used two beads per warps, giving a different look to the woven beads. No one says we have to weave just one bead per warp pair!!!


When both sides were done, I began to fill the center, as shown below. I ran the weft through two beads, not the entire row, to weave the larger, (4mm) size beads down the center. This allows more room inside the outer beads for me to finalize, with an edging.


The 4mm were equal to three of the 11/0. Again, just a bit of calculation, but not much. Since many options can be available to create a similar weaving, decide how many seed beads equal the large size bead width you are also weaving, before warping the loom.

Once the entire length of this cuff was woven, in this manner, I added the edging. I am not sharing this portion, for finishing the cuff, in this Blog post. You can use options I have shared in other posts, here in this Blog.

Usually I suggest warping the loom with a matching thread color, to the predominant bead color you are weaving. However, to make a creative statement, I used a black thread this time. Because the warps are not running between every single seed bead, the dark warp thread give off a wide stripe feeling. As a matter of fact, I am going to use some lime green or royal blue (with light color beads) to create another cuff using a loud color warp thread.

White weft threads are also a stable suggestion I give, but because you are turning the weft through rows of beads already woven, multiple times, it would be better to continue the weft in the same color you warped. Don't forget to consider how the weft becomes the 'bead color boss', as I shared in another Blog post! This knowledge may also help you decide the bead finishes you choose. Here I opted for 'opaque' bead finishes, to handle the black weft thread and not change the color of my beads.

Monday, September 12, 2011

Adding Hand Woven Accents!

I have completed the entire base, of this Christmas Tree Cuff. Here you can see I added three separate sections, creating the entire flow of the branches, along the bottom. This was not only the best way to complete this design, for the look of tree branches, but thinking further ahead...how the cuff will wrap around my wrist while being worn. Completing the design this way, the branches will sweep upwards on the ends, keeping the three front and center as opposed to totally wrapping around my wrist. I'll point this fact out again, when I share pictures of the completed cuff.


I started with the left lower portion, keeping the inside beaded section attached to the loom.


This addition what half hand woven and the rest completed directly on the edge of the looming. The tree will now have movement, as I mentioned in the first paragraph, in this post.


Let me share the stages that went into creating these beaded additions.

First, I hand wove a portion of the tree, based on a pattern I created, printing it in a loom and a brick stitch pattern. Working with both patterns, I drew a pencil around the sections I wanted to add as a 3D effect.


There is a long tail, of thread, at both ends of the off loom beading. One end is to attach the finished piece and the other will be used to continue the beading, along the loomed edge.


Once the beaded section was completed by hand, as far as I wanted it to hang over the loomed pattern, I turned the work to continue with my hand weaving. Once I finished the last bead, of the separate bead section, the loomed edge was used as the 'pick up thread' so I could continue with the penciled pattern. This also is the stage that it will now be attached to the looming.


When I reached the end of my pattern, for this particular section, I turned to run the weaving in the opposite direction. Exactly as is completed for any type of hand weaving.


I continue back and forth till my pattern is complete.


Each of the thread tails are then used to secure the top and portions of these beaded additions, to the looming.


The first picture, shown in this Blog Post, is sharing how I included three separate sections for the base of this tree. The center portion was a bit different, only in the fact I hand wove two sections, (left and right) before starting my attachment to the loomed edge.

I am working on each level of this tree, so it will be completely covered with layers of branches.

Saturday, September 10, 2011

Cuff WIP!


While working on a new pattern, it came to me that I haven't been sharing WIPs much, in my Blog. So, here is a picture of my next pattern, 'Work In Progress'.

Even though there are necessary changes I need to make to my bead journal of colors, I still prefer to work out a pattern and make bead color changes. Then, if the pattern is ever sold or shared, I know for a fact that it will work out perfect. One thing I will continue to say, "Never, ever purchase a bead looming pattern, if a graphic picture is the subject, without seeing it loomed first." So many patterns are sold, without being actually loomed. It can be very disheartening to purchase the pattern and all of the beads, only to find out, while looming, the colors are nothing like the pattern's picture depicts.

I have some extras to add to this cuff, but I am sure the subject matter is easy to figure out!

Thursday, September 8, 2011

'Perlen Poesie' IBA 2011, Contest Results!


It is wonderful news for 'Bead Looming'!
Of course, I am very happy and overwhelmed to have 'Placed', 1st & 2nd,
with my two entries:


"Spring Has Sprung"
1st PLACE, BEAD LOOMING


"A Glorious Day"
Tied, 2nd PLACE, BEAD LOOMING


'Perlen Poesie', (A Popular Beading Magazine, Published in Germany), has made a wonderful decision to include 'Bead Looming' as a separate category, in their First Annual Beading Contest! I was so happy to see this listing and it was a given, for me, to enter! My hopes are to expose more, of this beading technique. Whether it be in 'beading contest categories', 'the subject of bead weaving articles', 'included as a subscriber's bead work, in bead magazines', 'on the cover of publications', 'a focused web site', or 'huddling Groups of Bead Loomers, on FB, (which is going on now..read my side bar notes)!

I realize the lack of interest may be due to the lack of means to 'manage the warps'. My methods, devised over my many years of looming beads, are the absolute best and finest techniques to make those warps disappear. Of course there have been other new techniques too, which can also be considered. However, I feel so strong about my means of warp management that I am presently working on a venue to share it with everyone, making the first part of the year 2012 the year of "Bringing Bead Looming To The Forefront Of Beading Techniques!" Waiting for a decision to publish a book and being told, "It is all about timing", is not my mode any more!

Wednesday, September 7, 2011

A new Loom Woven Christmas Cuff, 'Fat Santa'!


This may seem early to post such a pattern, but it won't be until Christmas, or after the first of the year, that I can share some new and exciting news with everyone! I think this new venture is going to offer more insight into my loom weaving techniques, to everyone!

My 'Fat Santa' loom woven cuff, shown above, includes a bead swag of holly and berries, with 15/0 gold metallic ribbon. Then, a beaded Christmas Tree and Rudolph are creating the charms that dangle while wearing. The top of this picture shows the adjustable chain. I added some lamp work glass beads, candy and a tree bulb!

I am sharing one Christmas cuff here, but have been working on many new patterns, which I will share little by little!

Friday, September 2, 2011

Loom Woven Needle Case & Scissor Holder!

Being an avid beader, I too need a special place to keep my needles and scissors. It also helps to have something pretty to use, while bead loom weaving! I wove needles cases before, but recently revamped the pattern.

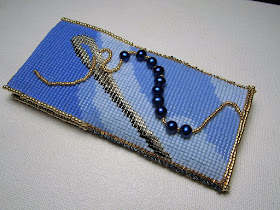
This case has a graphed pattern of a silver needle, being threaded with 15/o gold metallic glass seed beads and Iris Blue Potato Pearls. The length of this case is perfect to hold my loooong loom needles.


Because I also use short needles, for finishing and sometimes narrows strips of looming, I also created a second woven layer, on the back. This is now a handy little pocket to hold my shorter beading needles. My initial made the perfect graphic.


Before I totally zipped up the sides, I added a swatch of 'bead mat' to hold any single needles or those I like to have held for the next time I pick up a loom! The inside then doubles as a case to hold my long needles and to hold any needles in use.


After thinking hard on ways to make a holder for my beading scissors, I decided to stay with my usual mode of, sticking them into a rubberized wine bottle cork. This holds them well, with out any damage to the scissor tips. The rubberized cork also mends itself when not in use, so it can hold any size scissors, should I decide to change the type I prefer.

Here again are the same Delica bead colors used to loom the needles case. I also included the Iris Blue Potato Pearls and capped it off with a Deep Blue 18mm Rivoli and Permanent Gold Metallic seed beads, 11/o.


The opposite end is finished with a large surround to frame the rubberized cork, again to accommodate more then one size of scissors, if needed.


This is the most interesting and total Ah-Ha moment for me, a loomed circle sleeve to wrap around the rubberized cork! My first thought was to hand weave a sleeve, but I am so much more comfortable behind a loom. I knew there had to be ways to create this sleeve on a loom, so I tried out some of my techniques I invented to finish other loomed pieces, (using my warp management techniques).


You can see the close is flawless! I was so happy this worked out for me.


Now I have another chapter to include in my book! I would bet there are also ways to loom weave rings....hmmmm....let me think on this one!