


Once the decorations were complete, which is my favorite part..., I cut the beading from the loom, completed my finishing techniques for managing the warps, attached two snaps for a closure and will now begin the 'zip' process.

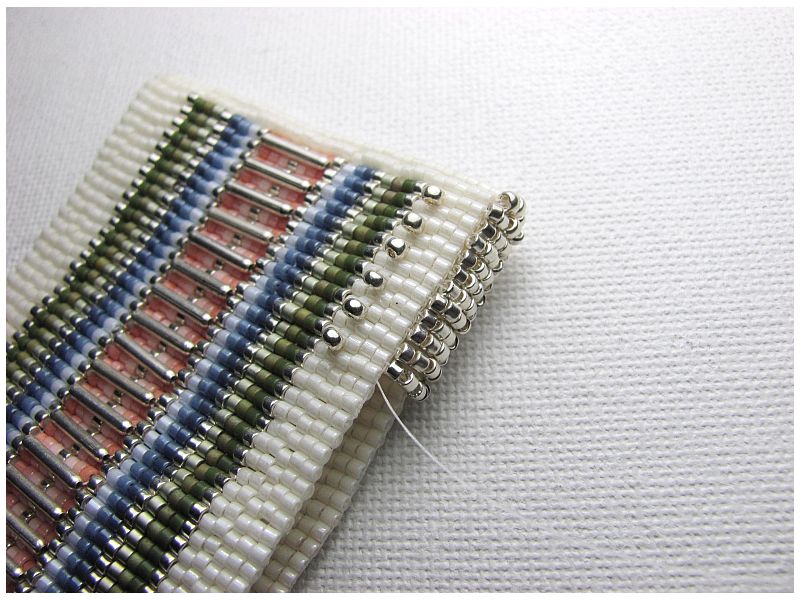
I want to create a wider case, not so much an 'envelope', to hold my needles. Therefore, I planned, during the looming process, to allow four rows of looming for the base of my case. At this stage, I edge with three beads, 11/0 Toho Permanent Silver Metallic, across the base I want to create. I planned four rows across the base, so this means I can add three edging beads.

Now I can begin the zipping of the sides. I can't use the same 11/0 beads for this because of the size difference with the Delicas I used to loom the case. If I use the Toho beads on the sides, as I did on the edging of the base, they would buckle. The shape and size difference in the Toho and Delicas I used would create this buckling. Therefore, I am using Delicas, in a Metallic Silver. The four loomed rows for the base and the three edge beads on the bottom will equate to using 'five Delica beads' for zipping up the sides.

As I continue up the side, from the base, I will also add a 'stop bead' for each turn of the needle, moving up the next row of loomed beads. I like to use a stop bead because I think it gives the thread a more secure way of holding the sides together. It also hides the turned thread, between the loomed rows.
I'll be wrapping this up and show the finished photos next!
Beautiful! I gotta start and finish my clasp class first :)
ReplyDeleteLooking gorgeous! I really like the accent beads!
ReplyDeleteAs usual something stunning and simply explained, maybe I will make a loomed needlecase too, just to take out my loom from my drawer!!
ReplyDeleteWhich are the dimensions in delica?
It is wonderful to receive replies! I enjoy being able to share and talk about bead looming!
ReplyDeleteChiara, I loomed this 35 Delcas wide. The number of rows total: 65 rows for each side, then four rows loomed as the base, when folded. Explaining it this way will give you a format for a design area, 35 x 65, for each side then four rows as base. That makes the total number of rows loomed 134.
Since I loom with longer needles, I made the case long. It may be too long for regular length beading needles, only because you would need to reach down deep for the shorter packs of needles.
I keep my scissors secured into a wine cork, which works perfectly so I am thinking of beading around a wine cork to make a matching tool set!
Now, go get that loom out of the drawer! I would love to help you get started!
This is so neat Erin! I make a lot sewing accessories but they're all hand embroidered pieces. I would love to start making them in beads soon (or whenever time permits... LOL).
ReplyDeleteThanks for the inspiration! As always, you ROCK!
Oh wow - look at how you finish things off, everything is always perfection! Simply stunning Erin!
ReplyDeleteThat's so fascinating to just watch. Almost feeling on my fingers how you add beads...
ReplyDelete